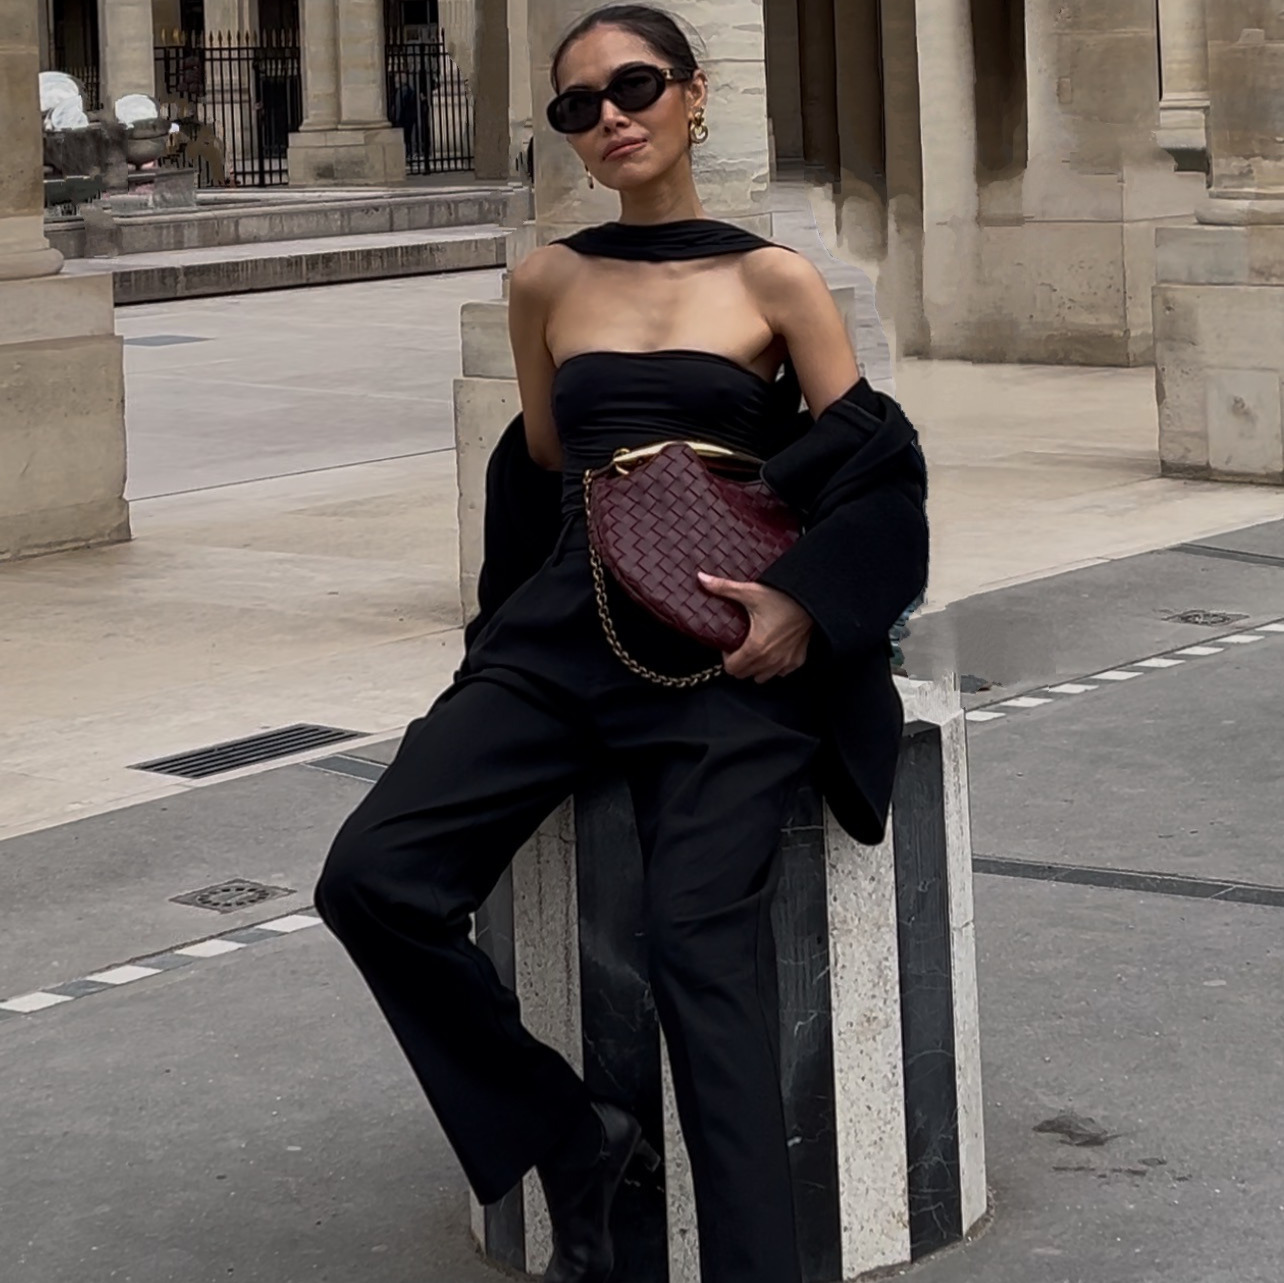
Simple products photograph themselves. A candle, a tote, a jar of cream. You can hand almost any AI tool a rough phone shot and get something usable back, because there is not much to get wrong.
Then there are the other ones. Anything with hardware, hinges, a clasp, a strap, a mechanism, two materials meeting at an edge. Anything a customer wears. Ask for those and you get an image that looks expensive and is quietly the wrong product: a buckle that has moved, a strap that passes through an arm, a frame that has grown a third temple. Nobody on your team can say what is wrong. Everyone can tell something is.
This guide is the fix. One photo of your product goes in. Six shots come out, all of the same product, ready for the page. The hard part is not the tool, it is four sentences most people never think to write.
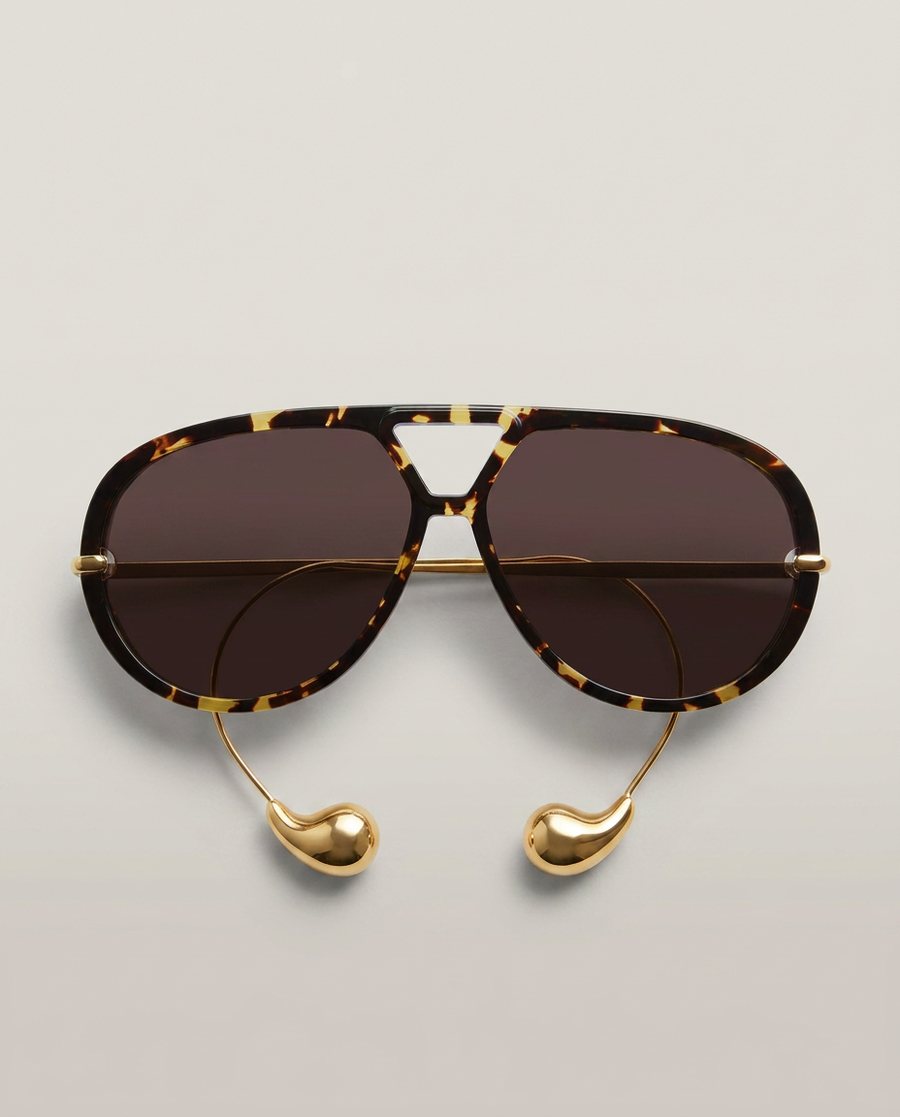
The front viewBuilt from a photograph of the real product, not from a description of one. The photograph is a phone shot taken on the arm of a chair, and it is a few paragraphs down.
The whole thing on one page
| Step | What you do | How long |
|---|---|---|
| 1 | Photograph your product once, on your phone | 5 min |
| 2 | Paste prompt 1. Ask for all six shots in one go | 10 min |
| 3 | Add the fit and scale lines for anything worn | 2 min |
| 4 | Fix what is off, one thing per message | 15 min |
What you need before you start
- Claude. That is the whole stack. No studio, no photographer, no retoucher.
- One clear photo of your product. Two if it has a side worth seeing. Phone is fine.
- A decision about your two detail shots. Which two parts would a buyer zoom into before paying? That is what they are.
- Ten minutes of looking. Judging the result is your job and it is the only part that cannot be handed over.
Step 1. Photograph your product once, properly
This is the whole foundation, and it takes five minutes.
Put the product on a plain surface near a window, in daylight, with no overhead light fighting it. Fill the frame. Keep the entire product in shot, including the parts you find boring. Take one straight on and one from the side.
You are not making the final image here. You are making the reference that every final image gets measured against, which is why sharp and complete beats styled and beautiful. A slightly dull photograph of the real thing outperforms a gorgeous one with a corner cropped off, because the corner you cropped is the part AI will invent.
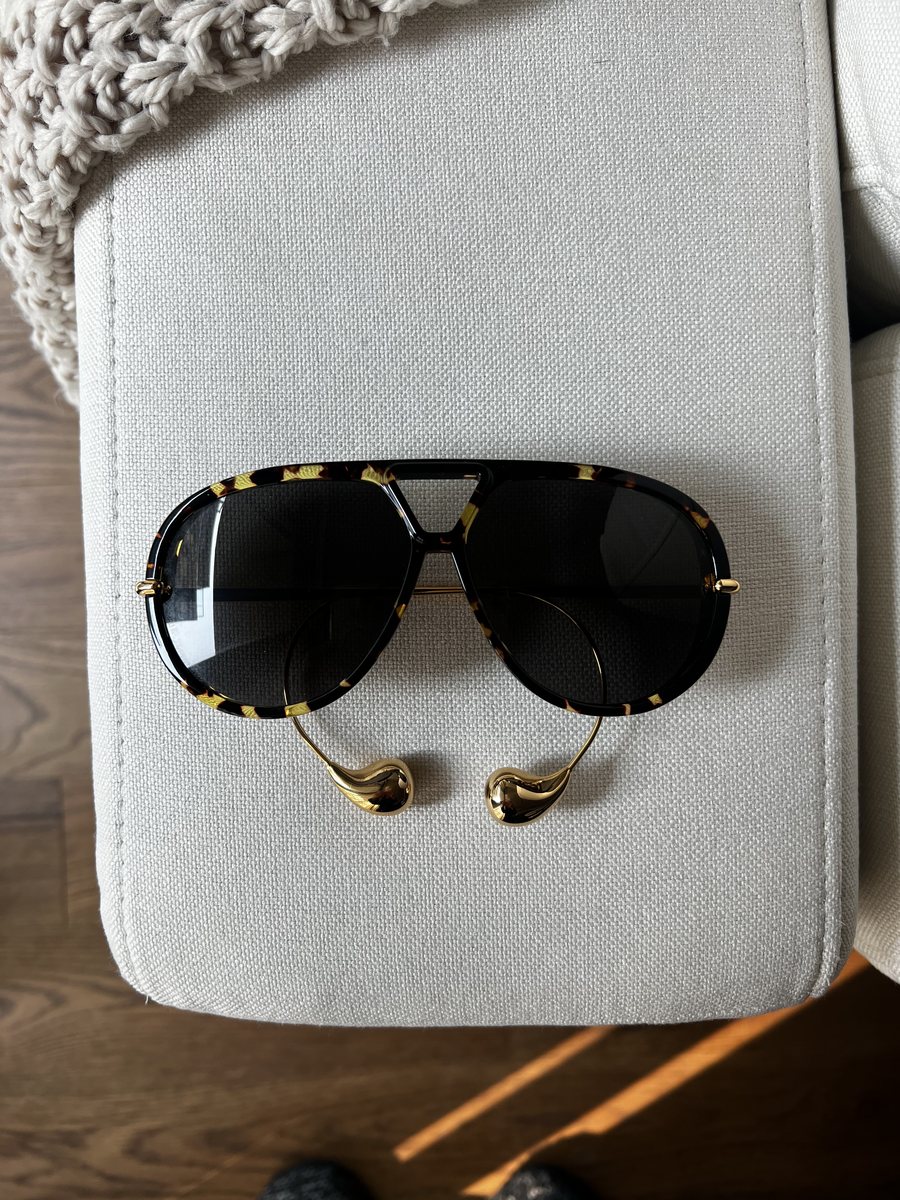
The only inputShot on a phone, on the arm of a chair, in afternoon light. Every other image on this page came from this one.
Step 2. Ask for all six shots in one message
Not one at a time. A set asked for together holds together, because the same decisions about light, backdrop and distance get applied across all six. Six separate requests produce six separate photo shoots.
Read that middle instruction again, because it is the difference between this working and not working. Keep the product exactly as it is in my photo. Do not redesign any part of it. Without it, AI treats your product as a starting suggestion and improves it, and the improvements are always the parts that make it yours.
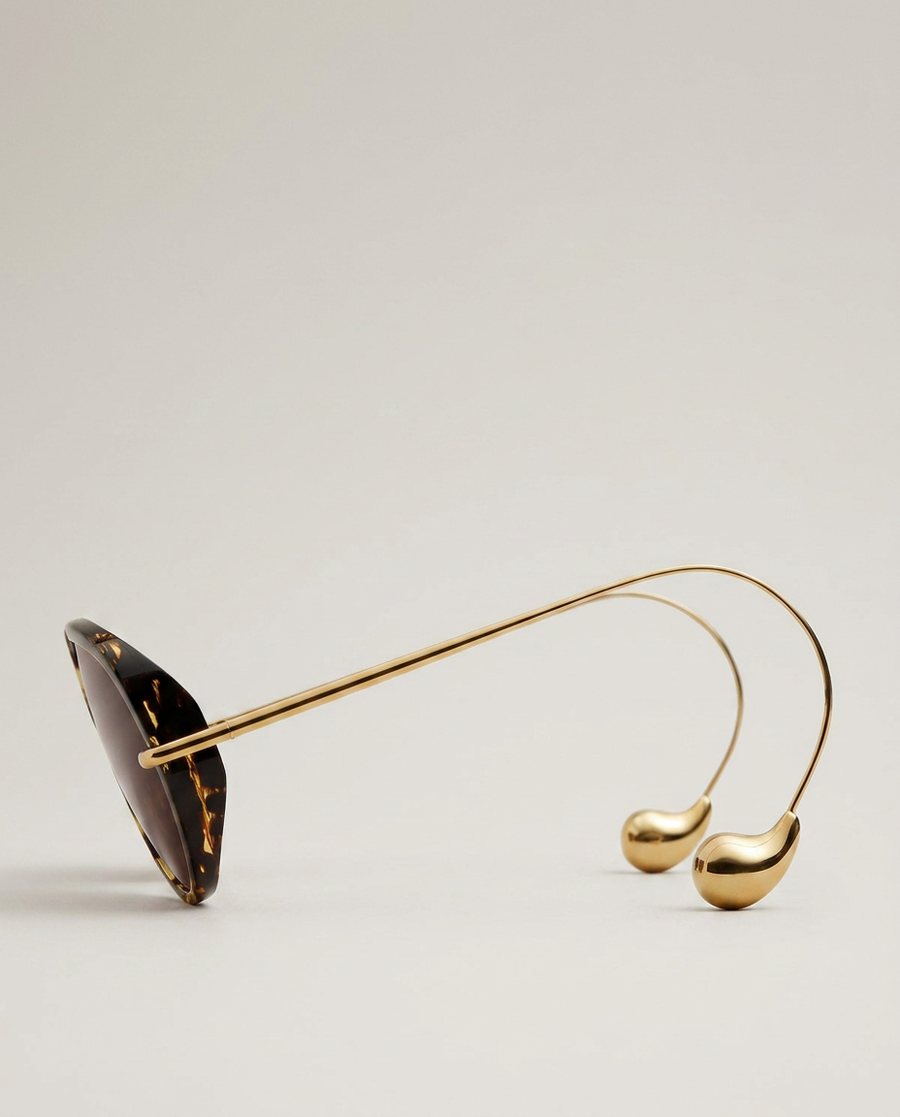
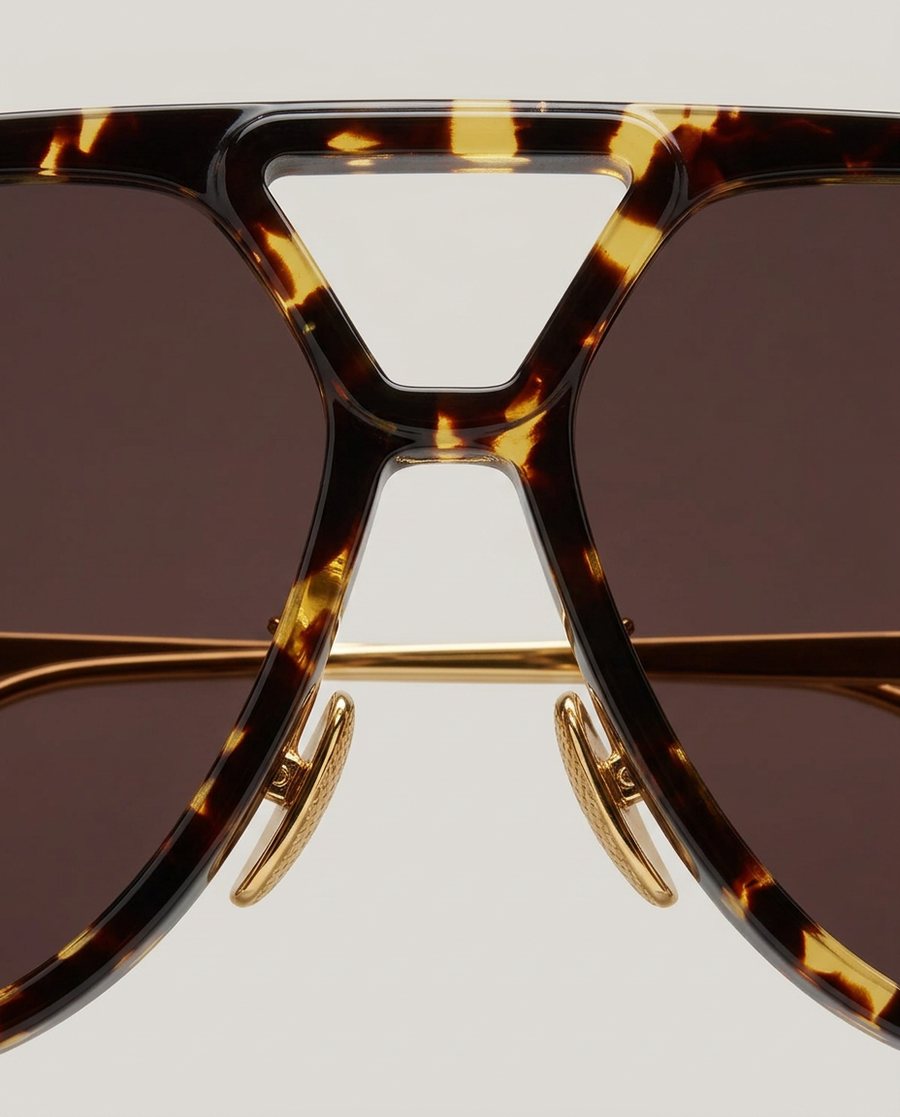
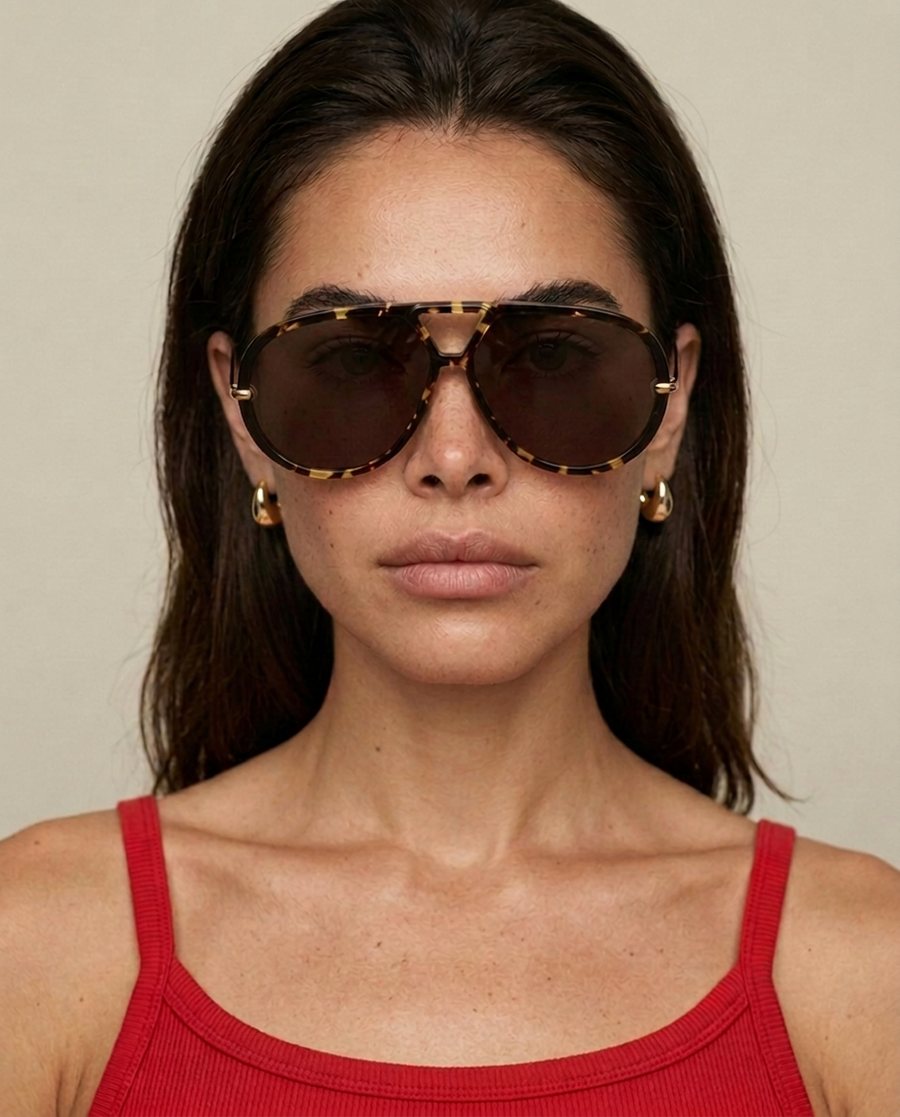
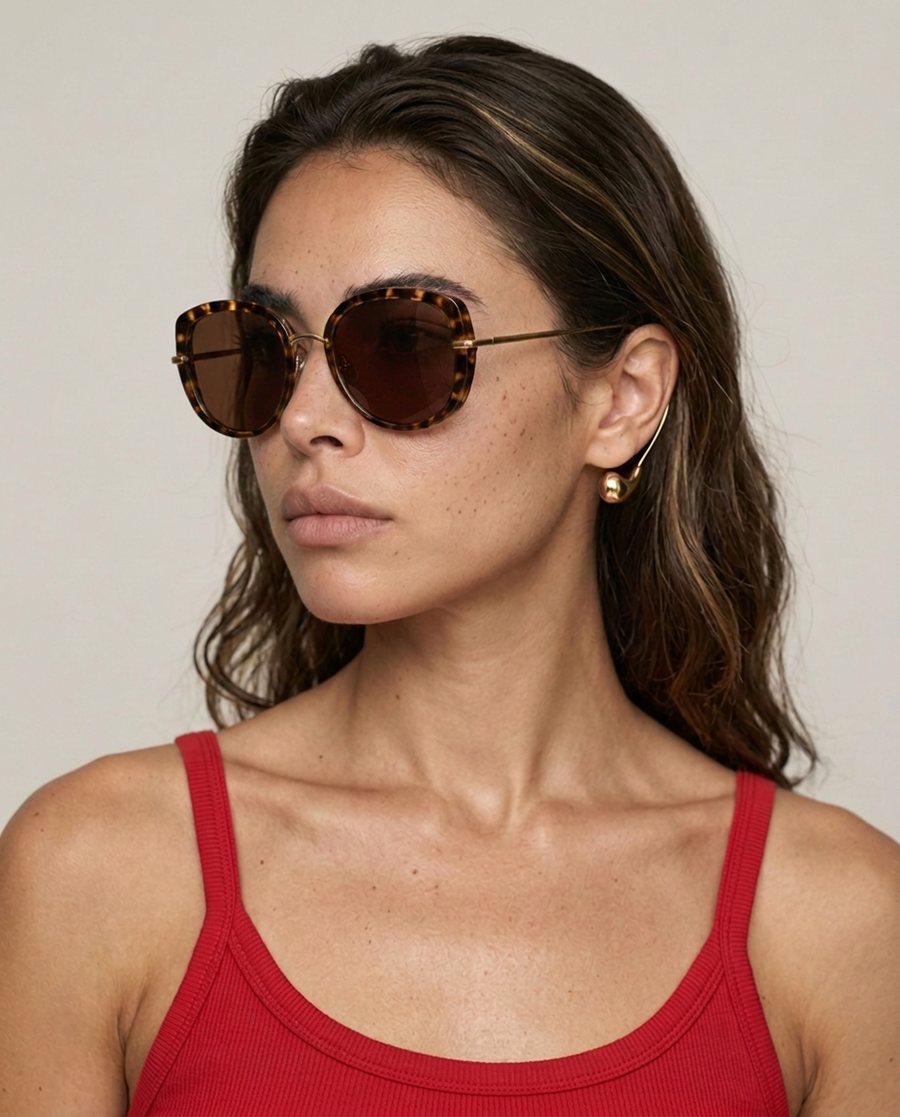
A few of the shots that came back, all of them built from that one phone photo. The second detail crop is not shown here.
Step 3. Add fit and scale for anything worn
This is the step that separates products a person wears from products that sit on a shelf, and it is where most sets fall apart.
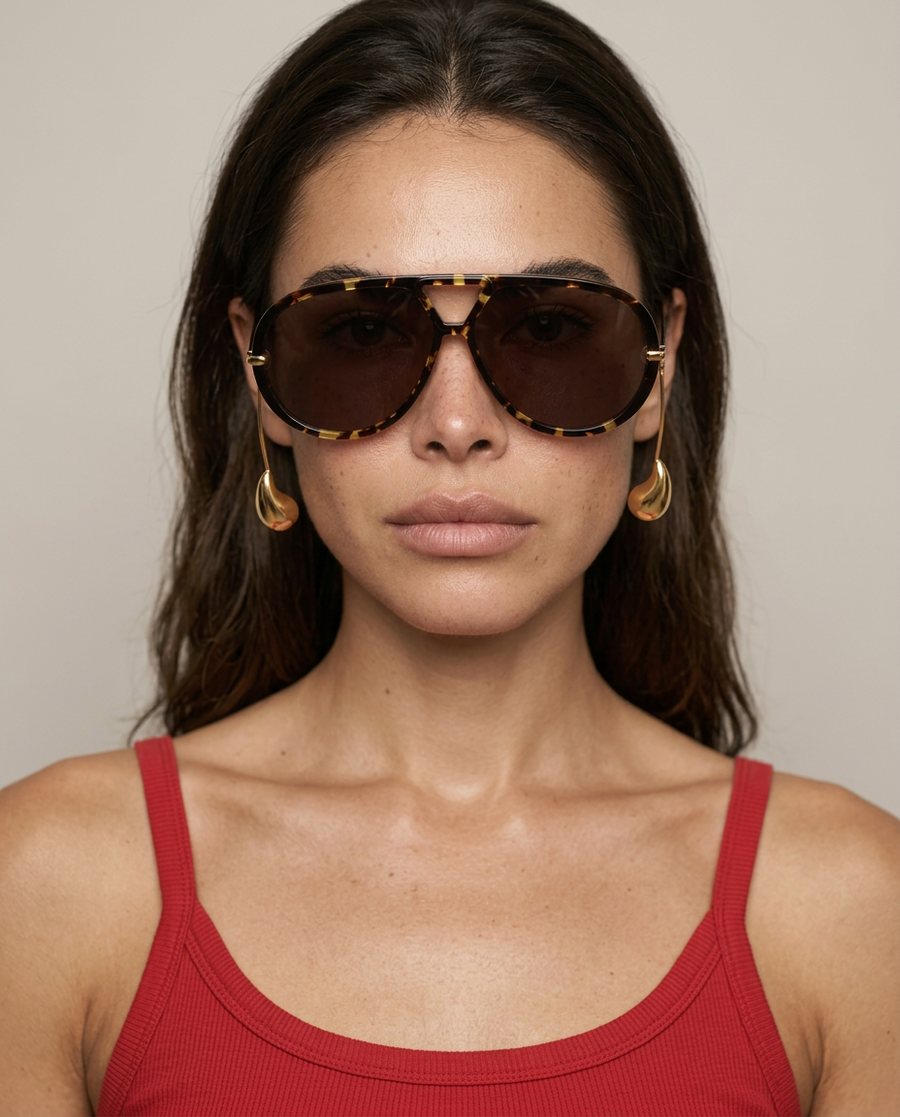
An image model has never worn your product. It knows what your product looks like and nothing about how it attaches to a body, so it guesses, and the guess is usually a version floating in front of the skin at a size it invented. Adjectives do not help. Small, short and delicate are not measurements.
Two sentences fix it. One describes the physical attachment. The other measures the part against something visible in the same frame.
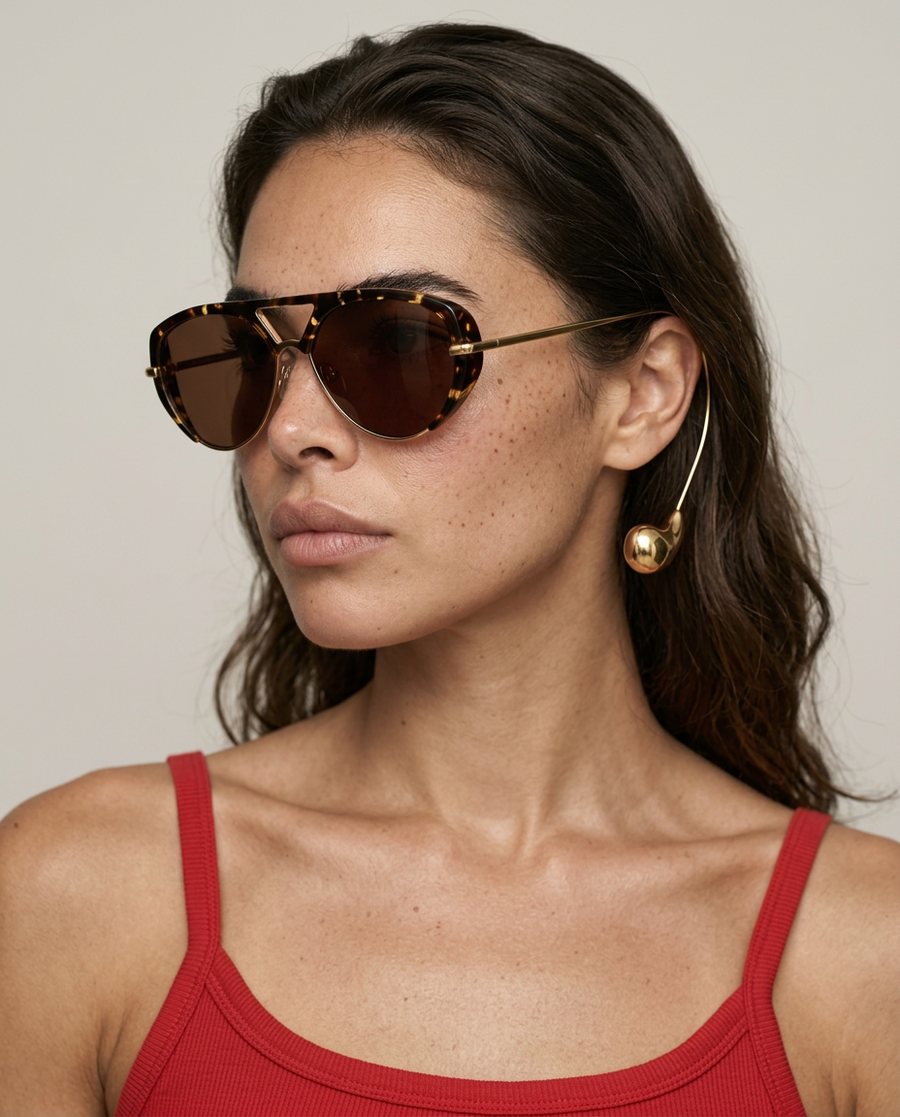
The pattern transfers to anything on a body. A watch case measured against a knuckle. A pendant that sits in the hollow of the collarbone. A bag strap that crosses the shoulder and falls to the hip. Name a body part in the same frame and you have given it a ruler.
Step 4. Fix one thing at a time
Something will be off. That is normal. What matters is how you ask for the change.
Do not rewrite your original request and run it again. That rerolls everything, and you lose the face, the pose and the light that were already right while you chase the one thing that was not. Hand back the image you just got and name a single change.
There is a catch worth knowing before you start, because it is the failure nobody warns you about. Every image carries a little drift. Correct shot six off shot five, then correct that off the one before it, and the drift compounds quietly until the product in your last image is not the product in your first.
So go back to your original product photo every few rounds. Re-attach it and say keep the product exactly as it is in this photo. It costs one message and it is the single habit that keeps a set of six looking like one product instead of a family of cousins.
Ask for detail shots one angle at a time Optional
Close-up shots are where products grow extra parts, and the cause is almost always that two reference angles were supplied at once. Given a side view and a top view together, an image model will helpfully combine them, and you get a frame with three arms or a bag with two clasps.
Two things prevent it. Use one reference angle per detail shot, and say out loud how many of the part exist.
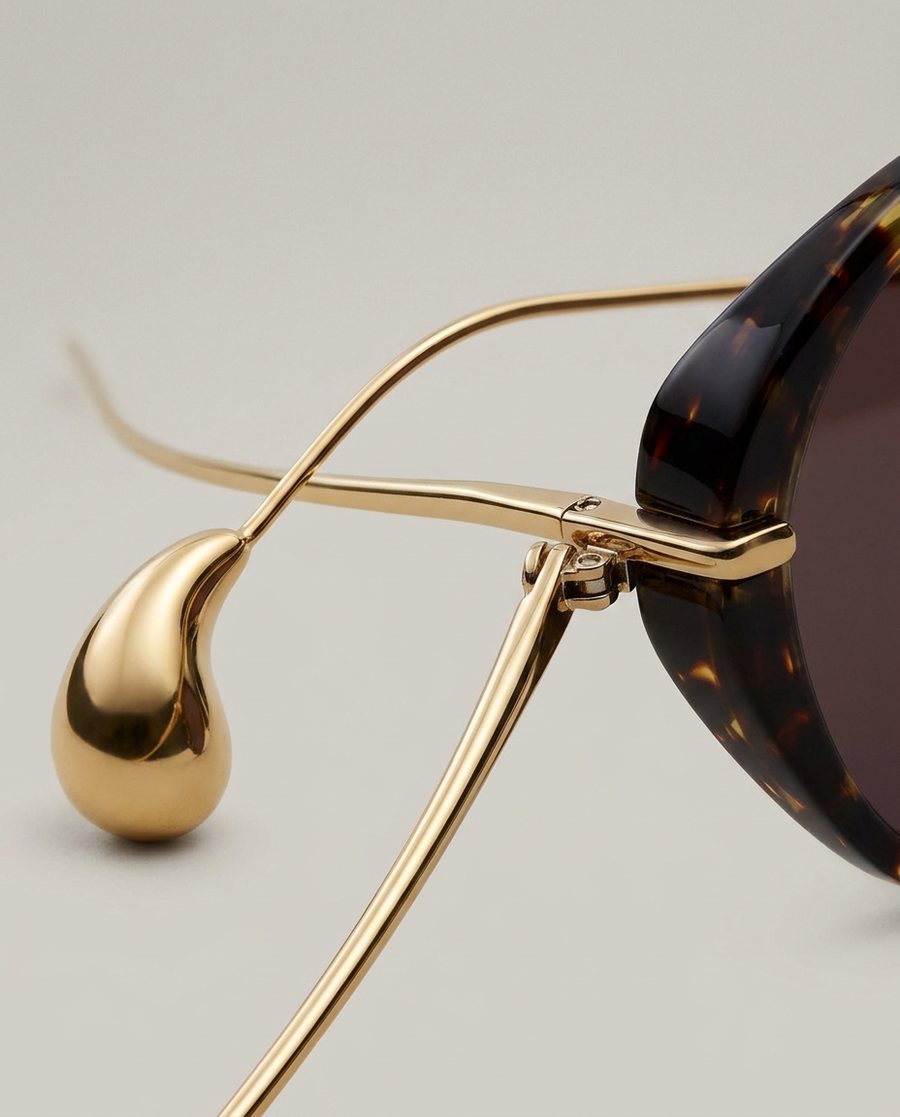
What two reference angles produceThree arms on a product that has two. Give it one angle and a count, and the part appears once, as it exists.
The prompt chain, in order
| Prompt | What it does | What you get back |
|---|---|---|
| 1 | Builds all six shots from your own photo of the product | Six images that sit together |
| 2 | Attaches the product to a body and gives its hardware a size | A product worn, not hovering |
| 3 | Changes one named thing and freezes everything else | The same photo, one thing different |
| 4 | Crops to a detail without duplicating the part | One clean close-up |
Things that make the difference
Hand over the product, not a description of it. A description is a recipe and every image built from a recipe is a fresh interpretation. A photograph is the product, and everything built from it inherits what you already own.
Measure hardware against a body part, never an adjective. Small and short mean nothing. Her earlobe, his knuckle, the width of a wrist are all things visible in the same frame, and a visible thing is a ruler.
Say how many of a repeated part exist. Two arms, one clasp, four legs. Counting out loud is the cheapest defense against a product growing a limb, and it takes six words.
One reference angle per close-up. Supply two and they get blended. This is the cause of nearly every impossible detail shot.
Re-anchor to your original photo every few rounds. Drift compounds silently. The product in shot six should be provably the product in shot one, and the only way to keep it that way is to keep going back to the source.
The checklist
- One clear photo of the real product taken in daylight, whole product in frame
- A second photo from the side if the product has a side worth seeing
- All six shots asked for in a single message, not one at a time
- "Keep the product exactly as it is in my photo" written into the prompt
- A fit sentence for anything worn, describing how it attaches to the body
- A scale sentence measuring the hardware against a body part in the same frame
- The count of any repeated part stated out loud on every detail shot
- One change per message, with "keep everything else exactly as it is"
- The original product photo re-attached every few rounds
- Shot six held up next to shot one before anything goes on the page
Can AI photograph a complicated product without redesigning it?
Yes, but only if you hand it the real product instead of describing one. A written description of your product is a recipe, and every image built from a recipe is a new interpretation of it. A photograph is the product itself, and everything built from it inherits the shape, the materials and the hardware you already own. The single instruction that does the most work is telling it to keep the product exactly as it is in your photo and change only the setting.
How do you stop AI changing your product between shots?
Go back to the original product photo every few rounds instead of building each new shot on the last one you liked. Each image carries a small amount of drift, and building a chain means the drift compounds until the product in the last shot is not the product in the first. Re-anchoring to your own photograph resets it. Ask for the whole set in one message for the same reason, since a set generated together holds together better than six shots requested separately.
How many photos of your product does AI need to start?
One clear photo is enough for most products, and two is better for anything with a side worth seeing. Shoot it on a plain surface in daylight near a window, fill the frame, and keep the whole product in shot. You are not producing the final image here. You are producing the reference every final image is measured against, so sharp and complete beats styled and beautiful.
Why does AI put the product on wrong when a model is wearing it?
Because nothing in the request tied the product to a human body. Words like small, short and delicate mean nothing to an image model, so it invents a size. Fix it with two sentences: one saying how the product physically attaches to the body, and one measuring the part against something in the same frame, like an earlobe, a knuckle or a wrist. Anatomy plus a measurable anchor is what turns a floating object into a worn one.
What are the six photos a product detail page needs?
A straight-on front view of the whole product, a side view, two close-ups of the details a buyer would want to inspect before paying, and two shots of the product worn or held by a person, one straight on and one at an angle. The first four answer what is it and how is it made. The last two answer what does it look like on me, which is the question that actually closes the sale.